Have been away..back to my hometown for a long deserving break. Ate and ate and ate!!! There’s no place like home..where you were born *o*
And I came back with a new sewing machine!
It has….
50 built-in stitches
2 one-step buttonholes
6 direct-stitch button selection
Push-button stitch selection - select your stitch easily with buttons, not dials
Auto tension - ensures stable stitch quality for every type of fabric
Vivid screen: LED - Clear, crisp display of stitch selection
Not comparable to what most of you may have but it’s a great upgrade to the ‘dinosaur’ that I have been using (*o*) . But the greatest of all..it’s a gift from my sweetheart!
I found a great site for cute designs for embroidery. I’m in the mood for some stitchery again. Am currently working on some teapot and teacups design for coasters. Will post them when it’s ready ^o^
This cutie dove is from…
…and it’s such a cutie. It offers monthly free design. So remember to bookmark the page.
I guess my little fingers are going to be busy !!!
The hobo bag is a style of handbag or purse that is typically large and characterized by a crescent shape, a slouchy posture and a long strap designed to wear over the shoulder. Hobo bags are made out of soft, flexible materials and tend to slump, or slouch, when set down.
Here are some hobo bags I'm 'drooling' over !!!
balenciaga-arena-hobo-bag
fendi-chef-hobo-bag
burberry_leather_hobo_bag
gucci-duchessa-hobo-bag
The Burberry Hobo reminds me so much of those gorgeous bags Lappeklipp made.
I particularly love this one and this one.
Meanwhile, I'm content to have those 'out-of-reach' bags sit in my blog for now!!! ^o^
A few days ago, I got a link to this Hobo.The Nomad Hobo from Hotpatterns.It has a square base, a seamed front & back and wide handles. I can't recall the exact date but the free pattern expires Feb 2010. So you better hurry and download the free pdf file before it's gone! I haven't tried the pattern yet, so....
to carry; lug: to schlep an umbrella on a sunny day.
That's what I need... a bag for me to 'schlep' my purchases on my shopping day!
This bag was posted at sentimentalstitches.net way back in 2006! But I stumbled upon it when I was in a bag making frenzy some months back (^o^)
You can download the pattern here. It comes with complete instructions on the making process.
I used three different fabric,of which two are scraps from blouses I made . The japanese cotton blouse didn't have much leftovers. So, I made a log cabin quilt block with it. So, you can actually use your favourite block as the focus point of your bag! I did not use 8" squares. Instead, I made using 6" squares and half triangles from 6.5" squares.
For the assembly, just follow the instructions from the pdf you downloaded from here.
For the lining, I used two 15.5 inch squares, 0.25inch seam allowance included.I used a thin layer of sponge as the batting. I like the cushiony soft feel of sponge, yet it gives body and support. *o*
Here it is.. a cute tote. It has a square base which makes it sit perfectly on the table.
That's the side view. It's cool to see how the construction of the bag 'arranges' the squares into diamonds!
I quilted the lining, added a hook strap for my keys and a magnetic button for closure.
This time, I embellished my bag with a brooch from an old t-shirt. Hmmm..that's vintage brooch ! ^o^
Remember that pintucks patch I yanked out from my blouse? Well, I didn't throw it into the bin but kept it instead. It took me some time stitching up those pintucks *_*
Lucky me, I stumble across http://sewchristine.blogspot.com of the United Kingdom. She has some pretty pdf tutorial which you can download. When I saw a tutorial for iphone sleeve, I said "Scotty, beam it over...quick!!!!" ^o^
You can download the pdf here. You have to go over to her blog for more tutorials.
The instructions were clear. But at step 8, instead of machine stitching, I whip stitch the edges together with double strand of thread.( hehehe..I'm a handstitch buff!)
I love it! Does it remind you of fish gills ??!! Hmmmm....
(\ /) ☼ ( . .) ♫ ♪♫ ♪ c(")(")✿❤ ✿¸.•*¨`*•..¸ƸӜƷ✿¸.•*¨`*•..¸¸.•* ╬♥═╬╬═♥=╬╬═♥╬♥═╬╬═♥=╬╬=♥ ** Have a wonderful day! **
I fell in love with this bag when I first saw it at lappeklipp.blogspot.com And it's stitched from hexagons! I love hexagons. They are the easiest to stitch, with the all the points matching perfectly when it's done the English paper piecing method.
I think the original design came from this Japanese book. You see Lappeklipp is written in Swedish ( and occasionally bi-lingual, thanks ). So I'm just guessing that the writer got inspiration from the book. Please pardon me if I'm mistaken #_#
There was no tutorial for this bag but then there was this picture showing how the hexagons are placed. Please head over to her posts .
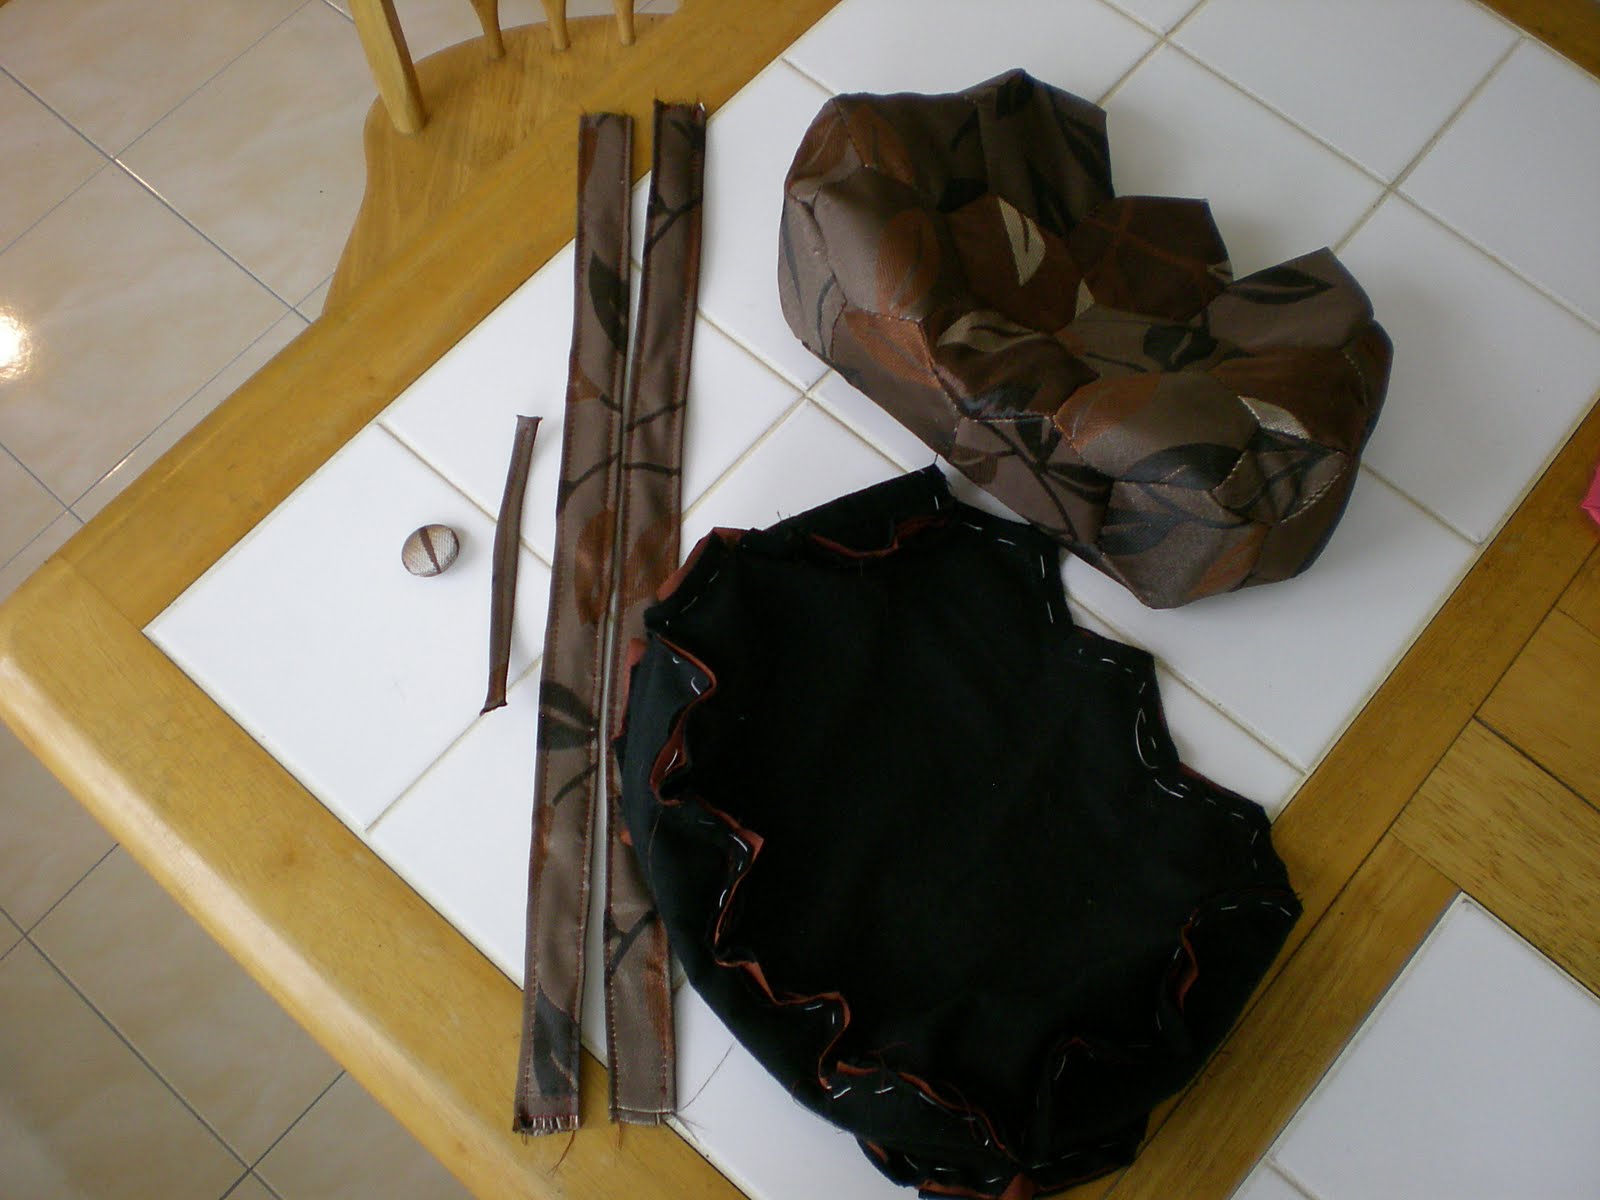
So, this is how I made my bag. You'll need twenty eight hexagons and four diamonds. Click here for the templates. I used the 4.5cm hexagon. Just enter the desired length on the Triangle Graph Paper PDF Generator page. Use a bigger hexagon if you like a bigger bag. Remember, I used the English Paper Piecing method, so I printed enough copies for 28 hexagons and 4 diamonds.
Then I started joining the hexagons and diamonds to make two bodies and a gusset. Make a lining for each piece using the pieced hexagons as templates. Remember to add seam allowance.
Join the gusset to the body. It's a bit tricky here because you need to keep on pivoting the hexagon sides to match the pieces.Use small whip stitch to keep the hexagons joined tightly. Do the same for the lining. When doing the lining, clip at the notches so that it's easier to pivot around. I used a running stitch to baste the pieces together. Pins didn't work for me *o* Then machine stitch it. I removed the paper from the pieced hexagons,all except for the gusset. You see, I don't like the feel of the paper in my bag but yet I need the support. Therefore, I left the paper in the gusset hexagons as the 'backbone' of the bag ! Oh yes..remember to press the hexagons before you remove the paper. That will form the crease and give it a 'neat' look. After the removing the paper, I find that the bag became limp ! That's why I added a layer of cotton flannel to the lining. It turned out perfect. As usual, position the straps and button loop. Then put the bag into the lining, right sides facing together. Then sew the pieces together. Remember to leave a few inches at the side of the lining open so that you can turn out the bag after sewing the top up!
Here it is! ^O^ The 'backbone' keeps the bag upright and sit nicely on the table. and the extra cotton flannel gives it body yet soft feel. I added a longer strap so that it can be used as a shoulder bag.
I wanted to add a magnetic button for closure , but my daughter proposed that I use a loop and covered button. I think it's a great idea!
The best part is the unusual yet beautiful shape for the gusset.
Again, I have to thank Lappeklipp for sharing her amazing bags with us. Have you gone to her blog yet?
Remember this red bag that I wanted to make? It's from the tutorial from http://lappeklipp.blogspot.com It's a beautiful blog. You have to make a visit there sometime...like now!! (^o^)
Started by cutting 22 squares. Then stitched them in the order above. Batting is very expensive here. So I used a very thin sponge which is sold by the meter and it's very cheap. I like to use it in making bags because it's light weight and it keeps the bag in shape. Used sponge when making these bags too.
Then it's quilting time. I hand quilted each square with three strands of tapestry thread. Need more practice here ^o^
That's two straps and the lining cut out using the quilted squares as the pattern. To assemble the bag...please head over to lappeklipp.blogspot.com for the tutorial.
Here it is !!! I love it..it's so cute.
I tweaked the pattern a little. I added a small dart on each corner because I find the bottom a little too pointed. Besides, I think the dart made the bag sit better on the table :~D
o
As usual, I make my own covered button. You might notice that the lining, strap,button and loop are of the same fabric.
It's not my fault. There are so many many amazing tutorials out there. There are so many talented artistic and generous ladies so ever willing to share their crafts.
So, I had to dive into my stash of scraps to try it out ! It's super easy to make. You make the top as well as the back at the same time ! I made four squares to create this pinwheel design. The best part is, there's no binding to do *o*
I can see myself all curled up in this comfy quilt on a rainy day ^o^
Judy created this from a quilting book called Patchwork with Pizzazz. Thanks Judy for sharing. Hurry off to Judy's tutorial now !
Made this last week. Cotton is very cooling and comfortable to wear but it wrinkles so so easily !! (*o*) Those two large buttons are self covered using the button maker.
Used the same cutting from this blouse. I find it great to 'cover-up' the extras I gain in my mid-section as I approach my mid-century age!


