
I fell in love with this bag when I first saw it at lappeklipp.blogspot.com And it's stitched from hexagons! I love hexagons. They are the easiest to stitch, with the all the points matching perfectly when it's done the English paper piecing method.

I think the original design came from this Japanese book. You see Lappeklipp is written in Swedish ( and occasionally bi-lingual, thanks ). So I'm just guessing that the writer got inspiration from the book. Please pardon me if I'm mistaken #_#

There was no tutorial for this bag but then there was this picture showing how the hexagons are placed. Please head over to her posts .

So, this is how I made my bag. You'll need twenty eight hexagons and four diamonds. Click here for the templates. I used the 4.5cm hexagon. Just enter the desired length on the Triangle Graph Paper PDF Generator page. Use a bigger hexagon if you like a bigger bag. Remember, I used the English Paper Piecing method, so I printed enough copies for 28 hexagons and 4 diamonds.

Then I started joining the hexagons and diamonds to make two bodies and a gusset. Make a lining for each piece using the pieced hexagons as templates. Remember to add seam allowance.
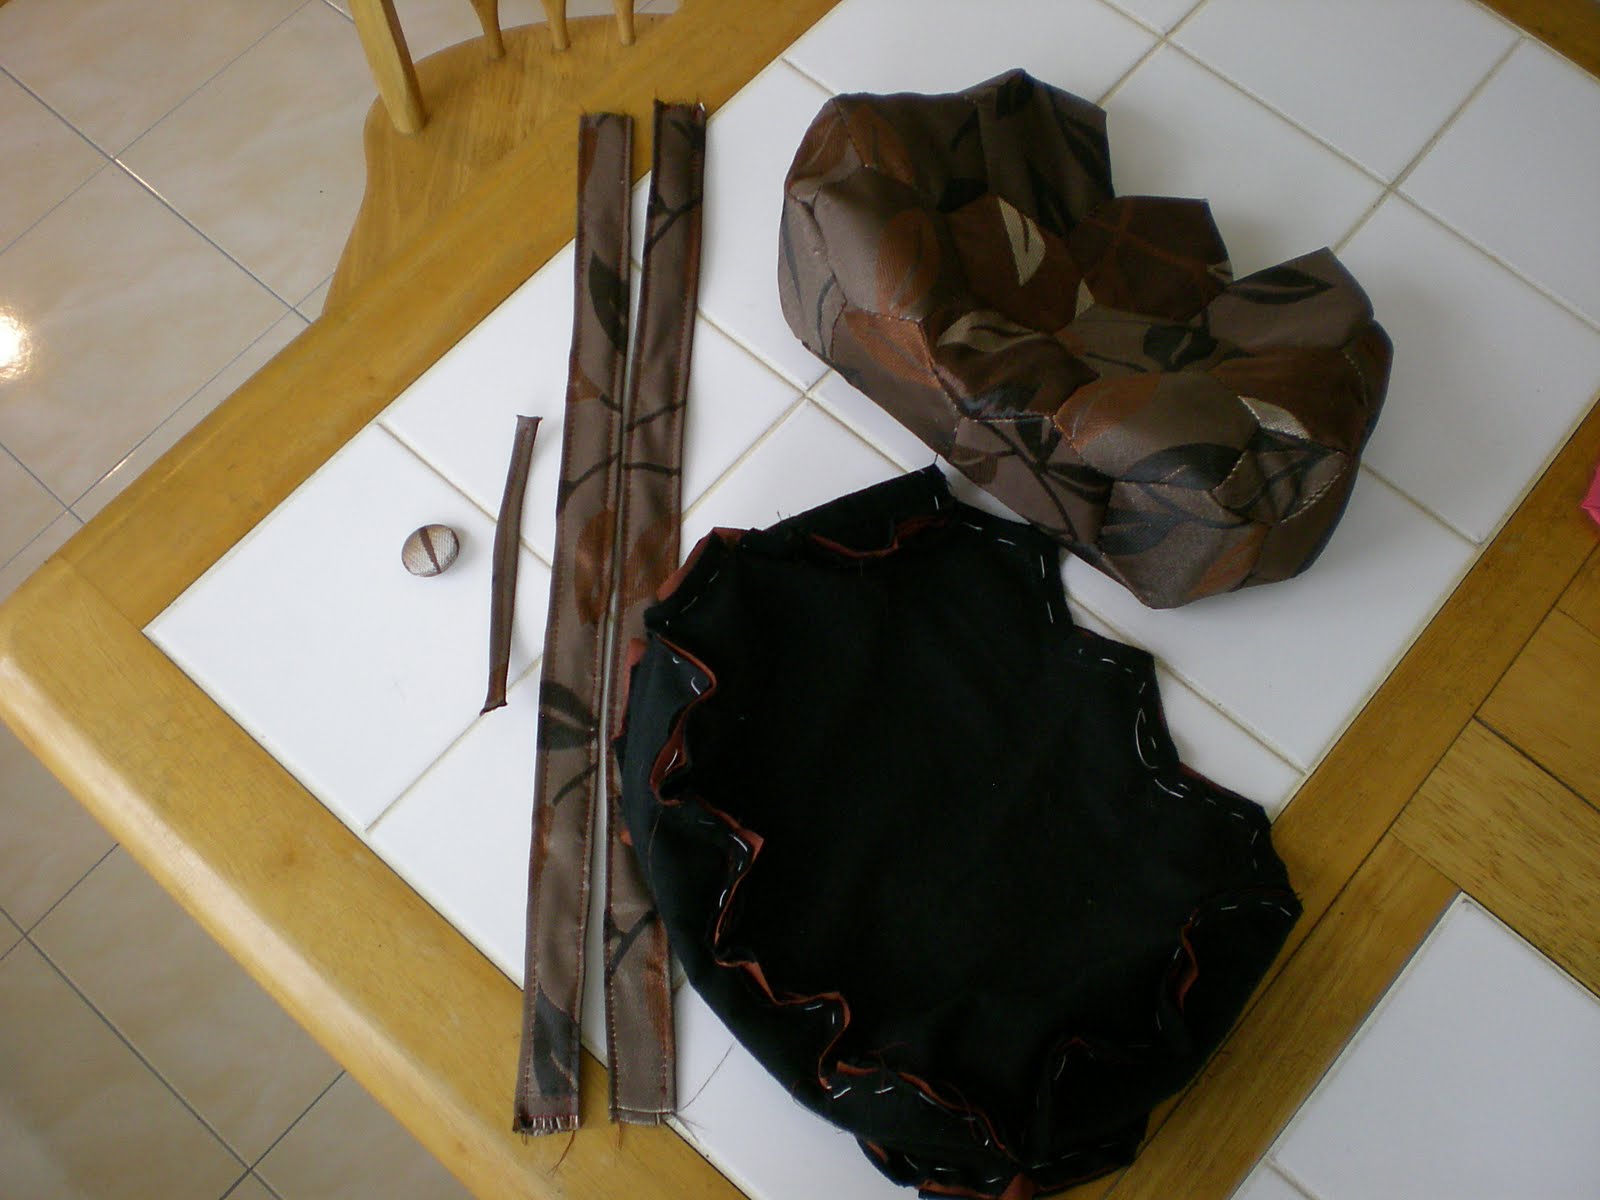
Join the gusset to the body. It's a bit tricky here because you need to keep on pivoting the hexagon sides to match the pieces.Use small whip stitch to keep the hexagons joined tightly.
Do the same for the lining. When doing the lining, clip at the notches so that it's easier to pivot around. I used a running stitch to baste the pieces together. Pins didn't work for me *o* Then machine stitch it.
I removed the paper from the pieced hexagons,all except for the gusset. You see, I don't like the feel of the paper in my bag but yet I need the support. Therefore, I left the paper in the gusset hexagons as the 'backbone' of the bag !
Oh yes..remember to press the hexagons before you remove the paper. That will form the crease and give it a 'neat' look.
After the removing the paper, I find that the bag became limp ! That's why I added a layer of cotton flannel to the lining. It turned out perfect.
As usual, position the straps and button loop. Then put the bag into the lining, right sides facing together. Then sew the pieces together. Remember to leave a few inches at the side of the lining open so that you can turn out the bag after sewing the top up!

Here it is! ^O^ The 'backbone' keeps the bag upright and sit nicely on the table. and the extra cotton flannel gives it body yet soft feel.
I added a longer strap so that it can be used as a shoulder bag.

I wanted to add a magnetic button for closure , but my daughter proposed that I use a loop and covered button. I think it's a great idea!

The best part is the unusual yet beautiful shape for the gusset.
Again, I have to thank Lappeklipp for sharing her amazing bags with us. Have you gone to her blog yet?

Amazing!!! You are so good with your fingers! Love the bag.
ReplyDeleteHi Penny! Yes you´re right, the bag is from the Japanese book, perhaps you saw that I earlier made one with the crochet too. Did you find the same book?
ReplyDeleteHexagons are so grateful to use in many ways don´t you think?
I love your hexagon-bag and hope to see more of your fantastic sewings in the future.
Hugs from L.
Thanks L. Glad you liked my bag. But no, I didn't get the same book. I had to figure out how to stitch up the bag. But thanks to one of your photos, I realised it was a diamond at the corner. So it was lots of jigsaw work to do at first! Hugs & hugs too.
ReplyDeleteYour bags are fantastic !
ReplyDeleteI really like your cute bags! I found my way owr here from Lappeklipp, and I'm sure are going to visit again. Have a nice day
ReplyDeleteregards from Sweden
you are wonderful.
ReplyDelete